Showing posts with label stitching. Show all posts

Tuesday, March 5, 2019

CQJP 2019 - February Block

Finally completed my February block for CQJP 2019.  I knew it was going to take longer because I wanted it to have tons of sparkle to reflect the frivolous time period.  The fringe and fabric details are all done individually by hand.  I've used lots of beads, sequins and metallic threads and fabrics.  The seam along the lower left is a furry yarn trim with a rhinestone strip in the middle.

2019 CQJP - February - Roaring Twenties

The photo just below helps really show the sparkle.

Tons of sparkle on this one!
Below is the (almost) naked block.  I am having a little trouble getting my images to print out onto the fabric as bright as the actual painting.  I ended up adding a little metallic detailing to this figure so the rest of the block's sparkle didn't overwhelm it quite as much.

1920s naked block for JQJP 2019

Details about this decade referred to as the Roaring Twenties are on the previous post.  Hope you like it!

Tuesday, January 1, 2019

CQJP 2019 - 20th Century Ladies

2019 is here and I'm ready and excited to begin my Crazy Quilt Journal Project for this year.

As you may know I am a watercolor artist and crazy quilter, so it seemed natural to incorporate some of my paintings into my quilts.  My latest endeavor is painting fashion ladies from each decade of the 20th Century trying to incorporate the character, fashion and mood of each decade.  I thought it would be interesting to create CQ blocks for each using fashion colors and some of the fabrics from each individual decade.  It has been absolutely intriguing studying the fashions and learning what worldly influences and public figures affect the styles and attitudes in women's fashions.  Since there are obviously only 10 decades in a century and I have already created my 1900s painting and block it will not work for a full year so I have pre-planned how I will finish out the final three blocks.  You will have to stay tuned for those.

1900s:  My first painting and CQ block was done previously.  It was a lady for the 1900s.  Fashion at that time was pretty uncomfortable and unnatural for women.  It was referred to as Edwardian and included the infamous 'Gibson Girls'.  1900s ladies wore very restricting undergarments that cinched the waist tightly and forced the figure into what is referred to as a 'S' shape where the bust is forced forward, the waist tiny, and the behind extended.  The fainting couch was popular at this time because their corset was cinched so tightly causing the lady to faint.  Can you imagine!  Stiff high collars kept their noses in the air.  Other indicators of this decade in fashion included large, large brimmed hats, gloves, fans, umbrellas, heavy embroidered gowns, large single bustline (uni-bust) with a large flower in the center.  Colors were soft pastels and whites but could also include royal purple, blue, deep red and emerald green.  Fashions often included ruffles and embellishments such as rhinestones, lace and ribbons.  In other words, very feminine, delicate looking but constraining.  The 1900s and in previous decades Victorian etiquette and customs were very formal and included such topics as calling cards and visiting cards, tea etiquette, and it is fun and interesting to read about the language of fans and language of flowers.   I provided links to some of these but it is easy to find an abundance of information on all topics relating to the Victorian period on the Internet and in books.

Influential people included Sarah Bernhardt, Lily Langtry and of course the Queen.  Auto Chrome photography was invented in 1907.  The Theatre was popular entertainment.  Dances included "Boston" Waltz, Two Step and the Chasse'.

Following is my first painting and CQ Block.

1900s Lady - original painting copyright Connie R Eyberg Fine Art

1900s Lady Crazy Quilt Block

1910s:  My next block and the first for my CQJP 2019 is the 1910s lady.  This period also is referred to as Edwardian.  Fashion was influenced by Japanese and during much of this decade and normally included a blouse, skirt, dress and coat.  The heavy corset was abandoned for a less restrictive style, replaced with a straight, more natural figure without the frills and flounces.  The early 1910s was defined mainly by the popular "Hobble" skirt.  I suppose this is where the term 'hobble along' came from.  The length was around the ankles and early on they were so tight around the ankles it was extremely difficult to walk.  This was remedied by adding a bit of fullness, pleats and slits.  The tops were loosely cinched just above the waistline, necklines were V-shaped but with a blouse underneath and sleeves were long and looser.  Colors were brighter and included colors such as purple, pink and peach.  Large often over-sized hats were popular yet, but the brims became narrower and feathers were quite commonly used as adornment on the hats.  I did a painting of a lady in this style but didn't include her in the block. 

Early 1910 Lady watercolor painting - Copyright Connie R Eyberg Fine Art

About mid 1910 WWI had begun but the USA wasn't fully involved until around 1917.  Styles became more practical with fuller skirts (called Crinolines and considered more patriotic and practical) and shorter hemlines above the ankles.  The Armistice blouse came into being around 1918 at the end of the war.  Hats were still almost mandatory.  The tea gown vanished from the fashion scene.  Fashion colors became darker going into the copper, grey, browns, black, still some whites, burgundy, deep blues/navy and gold tones.

Influential people included Mary Pickford, Helen Gardner, Theda Bara, Pola Negri, Isadore Duncan, Lole Fuller, Gloria Vanderbilt, Tina Chow, and Gretta Garbo.  Fashion designer Paul Poiret and his wife Denise who modeled his Empire line dresses (Lecallier) greatly influenced the new fashion.  Fashion, hair and make-up was also influenced by the Silent Screen, Nickelodeon and Movie Stills.  This is also a time of the famous Titanic.  When war started women became involved by filling in vacancies left by men who had gone to war.  You have probably also heard of Rosie the Riveter who led the way to women contributing to the war efforts and resulting in a new confidence by women.  Interestingly also, although men's fashion, a designer named Burberry was commissioned to adapt an army officer's coat for the trenches and the Trench Coat was born.  Popular dances included Castlemaxixe, Ragtime, Tango, Fox Trot and Turkey Trot, Bunny Hug, Duck Waddle and Grizzly Bear.  It is fun to look some of these up on YouTube.  I would say the biggest influence of this decade was WWI making clothes darker and less frilly and more practical and also leaving women with a new confidence and awareness of their own strength.  The Women's Suffrage parade was held in New York City and NAOWS (National Association Opposed to Women's Suffering) was organized.  The actual timeline of the women's suffrage movement is here.

Lots of changes during this decade for certain!  Below is my second painting showing the general style by around 1915. 

Late 1910 Lady - watercolor painting copyright Connie R Eyberg Fine Art
Here is the naked block ready for stitching.  It isn't a very clear image but as you can see it is a stark change from the 1900 block.  There was still some lace and trims used in 1910 but not near as heavily used as in the 1900s.

1910s Lady Naked Crazy Quilt Block
This month I hope to finish up the stitching on this block and get my lady painted for the 1920s block.

Happy 2019 to you all!


Tuesday, November 20, 2018

I'm Back!

My goodness I have been neglecting my blog!  Thank you to those of you who have stayed with me.

I haven't been stitching a lot or doing much of anything with fibers as I have turned my attentions to my love of watercolor painting.  Although I have been doing little projects here and there I haven't shared them here.  The "itch to stitch" is back.  I will be stitching and checking in more this coming year as I have signed up for CQJP 2019.


Watercolor Painting by Connie Eyberg
CQ Block incorporating painting printed onto fabric
    

My 12 blocks will be entitled "Century Ladies".  Above is a 1900s lady I painted and then printed onto fabric and made part of a cq block using period fabrics and colors.  My intention was to do this for the 1910s through the 2000s.  I painted a 1910 lady but wasn't entirely happy with her and got "distracted".  I decided to make this my challenge for 2019 in the hopes it would pressure me into completing the series.  I hope to keep up as it will involve painting a new lady for each month in addition to creating my blocks.  I have already gathered some period fabrics so I should be pretty well set there.

Stay tuned and wish me luck!


Friday, February 19, 2016

My CQ Book of Inspiration Finally Completed

I am so excited to finally be finished and able to present "My Book of Inspiration" to you.  I love quotes and that is the basis for this fabric book.  The finished size of the book, including lace trims, is approximately 6 inches high by 4 inches across. I will start with the cover shown here.


Side angle.  This ended up being about 2 inches thick.


The first page you turn to includes a crazy quilt block created by Lisa Boni.  The facing green with the quote is actually the same shade of green as her stitching but you all know how light plays tricks with the camera.


Next is pink which I created.


Connie Kalina created the crazy quilt block in the following photo.


Next you will turn to the peach pages with the cq block created by Kristie Watson.  I stole her little peach bird from her block to add to my quotation page.


The blue cq block which comes next was stitched by Darlene Doerscher.


Finally, below is the yellow-gold cq block I created.


Inside the back cover I have shared the credits.


The back of the book is all lace and texture.


I thought I would be able to stitch much of the book with my sewing machine but found I much favored having it hand stitched.  I can't tell you how many hours I have put into this.  Every bit of construction is done by hand and every section of lace is stitched in place by hand.  Thankfully I am very pleased with the results and I actually do enjoy hand-stitching.  It is my form of relaxation.

The cq blocks were sent out for a mini round robin.  There were five of us, so four of the blocks were created by some very talented crazy quilters.  I created the covers, the remaining two cq block pages, and the quotation pages as well as construction of the book.

Here are some close-ups of the quotes that inspire me.


I wanted to include credits to those who shared their talents with me.  I love the blocks you each created and I really enjoyed working on your blocks.


Below is credit I try to give everyday.  I am thankful when I wake up everyday with a roof over my head, a warm home, a loving husband and family and peace of mind.  I try to take nothing for granted and feel each day is a gift I try to use wisely and each person in my life is there for a reason.


Hope you enjoyed my open book and that it inspires each of you as well.


Friday, January 29, 2016

CQJP 2015, Smocking Challenge in Lavender - Block 11

I am behind on my Crazy Quilt Journal Project but still enjoying the process.  For block 11 I got to work in my very favorite color - lavender.  Some people don't care for this color but it has a way of lifting my spirit.  They say blue is the number one favorite color which makes sense I guess.

Anyway, this is my first attempt at smocking.  Getting started was a bit tedious and I was glad I only needed small sections.  I marked my fabric uniformly by poking pin holes in graph paper and then marking with a pencil in the holes onto the back side of the fabric.  Once that was completed and gathering threads in place it was much more fun.  I used a checked gingham for my first which was easier.


I stuffed the bonnet with a bit of batting to keep it from going so flat when it is placed in my book.  I hand stitched it in place on the block, hiding the stitching.


Here is a close-up of the smocking on the bonnet.  The bonnet is done with a single piece of fabric, a bit of lace added along the brim and a ribbon bow at the base.  Too bad babies don't wear bonnets as much anymore.


This is the second section of smocking.  I added some little ribbon flower in the center.  This fabric is thinner and I found that my pencil marks showed through the fabric in some areas.  A good lesson to learn before taking on a bigger challenge some day.


This is the last section of smocking I created using checked gingham.  It really reminds me of the bigger pieces my grandmother used to do using bigger checks.  She would make pillows with them.  I think her favorite color was this lavender also as she also used gingham in this color and painted her bathroom a gorgeous lavender color with white trim.


I like the texture the smocking adds on the quilt block.  I could really see it incorporated in a tone-on-tone pillow in a limited amount of course.

Hope you enjoyed this block as much as I enjoyed working on it.  I will definitely be creating more lavender blocks in the future!  I understand there are boards and hand operated machines that simplify the preparation of fabric for smocking but for now I will do it the old fashioned way.  I would certainly invest in something like that if I were to find myself doing a lot of smocking.  Have any of you used these or do you do smocking by hand?  I really would love to hear your experiences!

Monday, January 25, 2016

Mini CQ Block Round Robbin Project

As usual I have several projects in the works.  I wouldn't have it any other way.  I wanted to share the progress on my mini blocks from my first round-robin in the International Crazy Quilters group.  All of my mini blocks have been received and I loved them all.  I did make some minor changes on some such as moving a button, rearranging the birds so they would be in the right direction for the completed project, but kept the beautiful work of those who worked on them for me.


For direction I sent samples of six pastel colors, cream and beige blocks and a request they choose one of the soft colors and have that color be the one they used on their block along with a darker neutral where needed.  I plan to use the blocks in a mini album with lots of laces added along the edge.


Kristie Watson of Indiana chose the peach color.  Love her roses in the upper corner, tatting, sequins and all the other details she added.


Darlene Doerscher of Michigan contributed the turquoise/blue block.  She added the pretty trims, lovely stitches and unique bead pieces forming the flower.  The little bluebird was perfect.


To finish out the blocks I stitch the yellow/gold block.  I struggled with this a bit as the yellow didn't stand out well on the light background and I didn't want the blocks to be bright colors, but rather soft pastel.  Adding the touches of amber helped bring the yellow forward.


Connie Kalina from Colorado chose my favorite color and did such a beautiful job with it.  The lavender bird, tiny pearls and wonderful ivory button were wonderful additions to go along with the beautiful stitching.


I decided I needed a pink block too so I stitched up another block and added the pink.


Lisa Boni, also of Colorado chose the green color as it is her favorite.  Love the floral bead cluster in the corner.  She does such delicate stitching which is perfect for the tiny blocks which measure about 2"x3".


I also created a block slightly larger than the others for the book cover.  It is more in the taupe family with a bit of gold and deep amethyst beads which almost look black in the photo.


Here are the inside blocks all together.  I will be facing each block to a solid colored pastel fabric.  My plan is to make this my 'Inspiration Book' as I want to add favorite verses to the solid fabric surrounded with lace.

Right now this project is gathered together in one of my project bags waiting for me to complete it.  I have some laces gathered and at least six favorite quotes chosen.  I want to finish my CQJP2015 first and then I will be making it into a book also.

Happy stitching everyone!  Stay tuned for more.

Monday, January 11, 2016

Crazy Quilt Journal Project 2015 - Needle Lace

Completed my 10th block for CQJP2015!  It is an experiment in needle lace which I have never attempted before.  So here it is, my first attempt, mistakes and all.  The photo color is a bit brighter blue than the actual block, but you can see the stitching regardless.


The first section I completed was in the center.  I began with the basic Single Net Stitch, followed by the Double Net Stitch and then the Buttonhole Net Stitch.  I then created some crossed straight stitches and wove some rings into that.  

The section on the right contains the Cloth Stitch, tighter and closer at the bottom (my left as I was working) and becoming slightly looser on the other end.  This was a stitch I really enjoyed doing and was very pleased with the results.  

The section on the left was started with Basic Russian foundation stitches to which I added some alternating Buttonholes.  I was getting frustrated here because my series of Buttonhole stitches began to twist.  I realized they are the same as the half-stitches I did in my Macrame experiment in which they were supposed to twist.  Maybe I am working them too tightly?  I would love it if anyone could suggest what I might be doing wrong.  I moved on and did a few Double Russian Stitches, creating a Buttonholed Bar at the end.

Top left is my attempt at a Woven Spider Web.

I then attempted some edgings along the outer tapes.  Top left - Knotted Edging (doesn't show up well); top right - Bullion Picot Edging; bottom right - Pinned Picot Edging; bottom left - Side Stitch Edging.

I enjoyed many of these stitches, especially the Cloth Stitch, and some I didn't care for...yet, but I know they will be great for filling in space and/or adding texture, color or interest using a matching or maybe contrasting fiber on future CQ blocks.  Lots of possibilities.

I'm ready to do another painting now before I complete the next, 11th block.  Hope everyone is having a great start to 2016!

Tuesday, May 26, 2015

CQJP 2015 - May Block - Ribbon Play

My completed May CQJP block - Playing with Ribbons
This month I played with Ribbon trims etc.  This is my completed block.  I will definitely be incorporating many of these in future projects.  I love ribbons and have a few references that, up until now, I have only drooled over.  This was a good opportunity to experiment.  I hope you like the results enough to try it yourself.


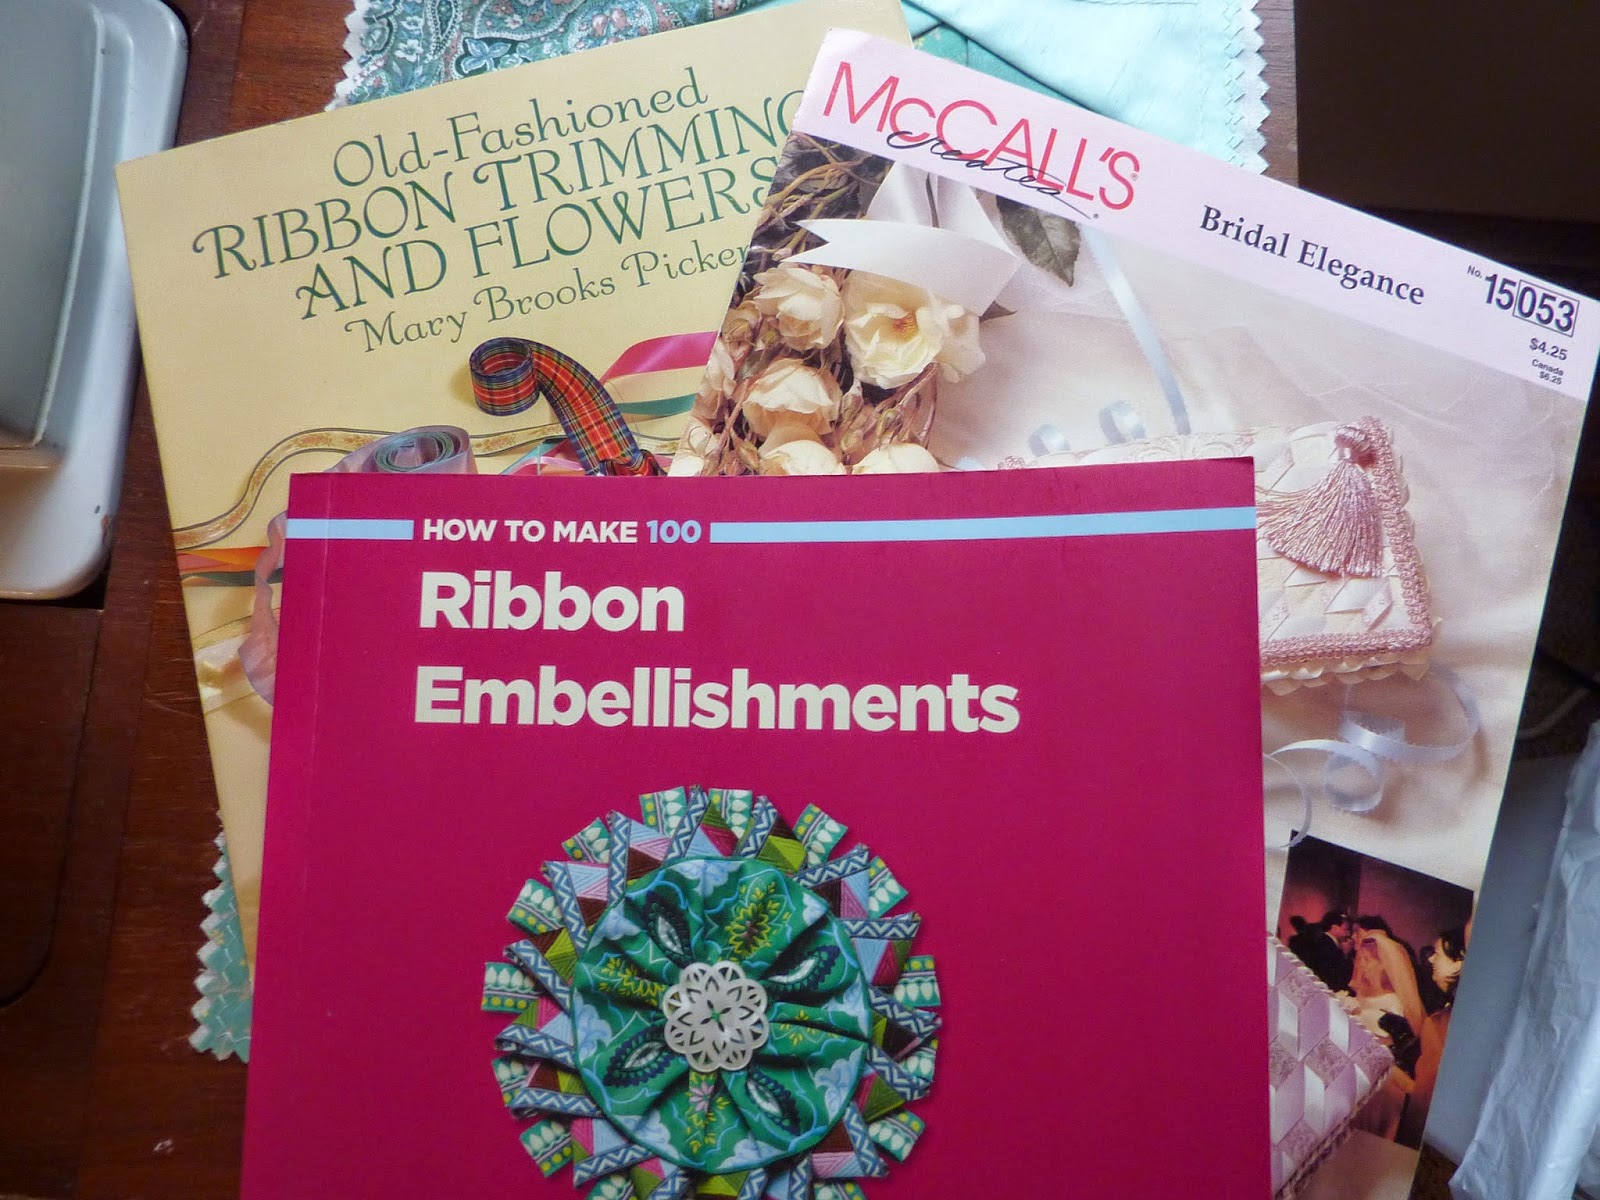
I began by replacing the center patch with a piece of woven ribbons.  For the woven ribbons I followed the directions on the booklet by McCalls called Bridal Elegance.  There are lots of possibilities with this weaving.

I believe I incorporated ten different ribbon trims/techniques not counting the little silk ribbon flowers just above the braided ribbons or the rosebud trim.  There were many more I could do but my blocks are going into a fabric book which would have flattened them so I chose to stick with the more flat techniques.  Lots of close-ups follow, captioned with the name of the ribbon trim techniques:

Ribbon Prairie Points topped with vintage rick rack, decorative embroidery and beads

Ribbon Beads Trim and silk ribbon woven through closed blanket stitch

Silk ribbon roses stitched over silk flower petals; center gathered ribbon below that
along with a ribbon bow

A little closer view of the center gathered ribbon and silk roses

Looped ribbon (top) and rosebud trim (center) - This wasn't added to block, just played with it

Another angle of looped braid and rosebud trim

Top view of two ribbon techniques

The narrow sheer ribbon in teal was used for the rushing technique -
Adds wonderful texture

Ribbon bow adorned with seed beads which also hold it in place
and a section of looped braid


3 colors of 1/4" ribbons - braided trim


Below are some books from my reference library.  I would recommend any of them.


Lots of eye candy and instructions in the following two books.  Beautiful vignettes and project photos for inspiration.


Ribbon Embellishments is a 'how to' book I just found at my local Hobby Lobby.  It is an excellent source with very clear directions and lots of photos of Trims/Braids, Rosettes and Leaves, Ribbon Sculptures and techniques with beads and baubles.  This is a definite keeper!


Now I need to figure out what I am going to do for June.  I have a few ideas but just not sure which to do next.