Showing posts with label Organizing. Show all posts

Monday, January 7, 2019

Button Storage

I was looking for buttons for my crazy quilt block and was sort of wishing I had something else I could store them in.  I had them in spice jars that were on a turntable.  That didn't work too bad as they were sorted by color but I had to dump them out if I was trying to find a nice mix.  It dawned on me I had bought this nice photo storage box at Hobby Lobby awhile back.  It consisted of smaller acid free boxes made to hold a group of standard sized photos.  Those 16 boxes fit neatly into a larger box that latched and had a handle for carrying.


I started dumping the buttons into the boxes according to color, including a box for clear buttons, silver and gold.  I had a lot of black buttons so did one box for large black buttons and another for small black buttons.


They fit!


The only ones that didn't fit were my white buttons.  I ended up putting them in another plastic box I had.  I think it was for pencils or school supplies or something.


This was my old button storage.  These spice jar turntables were at the dollar store and I sort of went crazy buying all I could find since a few years ago they were only about $5 as I recall.


Other uses I found for them were for jewelry findings, some pearls and chip beads...


Now to get back to stitching on my January block and avoid getting distracted, but I keep thinking of things I can put into the spice jars I just emptied.


Monday, July 9, 2012

New Naked CQ Block and A Little Floss


 I am gearing up for a few days of vacation this week.  We decided to take our granddaughters with us this year and we are excited to be spending some quality time with them making memories.  Their lives have become so busy with various activities that it seems we don't get  to spend a lot of time together like we used to.  They used to have sleepovers at my house and I really miss that.  Anyway, I digress. 

I am an early riser and like to have something to work on during my early morning quiet time.  I didn't want to take all my supplies to work on my CQJP2012 project so I created a CQ block to take with me.  I have been pulling everything pink from my stash as I have been organizing and putting it in a bag planning for a future pink and white/ivory CQ creation.  This will be the perfect opportunity to delve into it.  The hardest part for me is always in getting started!  Do any of you feel that way?  Once I have my block pieced and supplies pulled there is no stopping me, but it is always that first step.


I like the way the naked block appears and I love the lush fabrics.  I'm actually more of a lavender girl, but I do like pink, just not as much as I like lavender.  I think I am going to work my TAST stitches on it.  For TAST as you may know I have been creating tags and keeping each strictly focused on the stitch for the week (except for occasional straight or stem stitches).  This will give me the opportunity to mix it up and combine stitches.  I don't know how many blocks I will do or even what it/they will end up being.  This is just an exercise for the fun of stitching.  I will also be taking a naked tag with me so I can work on the week's stitch.


I went through my hodge podge bag of floss the other day.  I had purchased it at a garage sale for maybe a quarter.  I finally have it separated by color family into smaller bags.  OK, maybe it was therapy and didn't need to be done ~ lol!  It does feel good to have it separated out though.  Most colors don't have the numbers with them anymore and some are long, some short, but I think they will be used here and there, now and then.  How is that for commitment?  I have actually used some for TAST and will continue.

Are any of you showing off your studio  on Karen's 'Where Women Create' blog beginning this coming week?  I am anxious to browse through them to get inspired!  I hope your week is off to a great start.

Tuesday, November 29, 2011

ORTS? Excuse me? Now a part's going on!

Here is an update on my ORTs post...

MA of Magpie Mumblings shared a link about a year long ORTs challenge (a totally useless stitch-a-long as she calls it) going on for 2012 over at Daffycat. It sounds like a lot of fun. MA, you've talked me into joining in the fun ~ lol. And to think a week ago I had no clue what an ORTs was!!! Click on DaffyCat's blog link above to see what it is all about and join in the fun.

When I least expect it I learn something new!


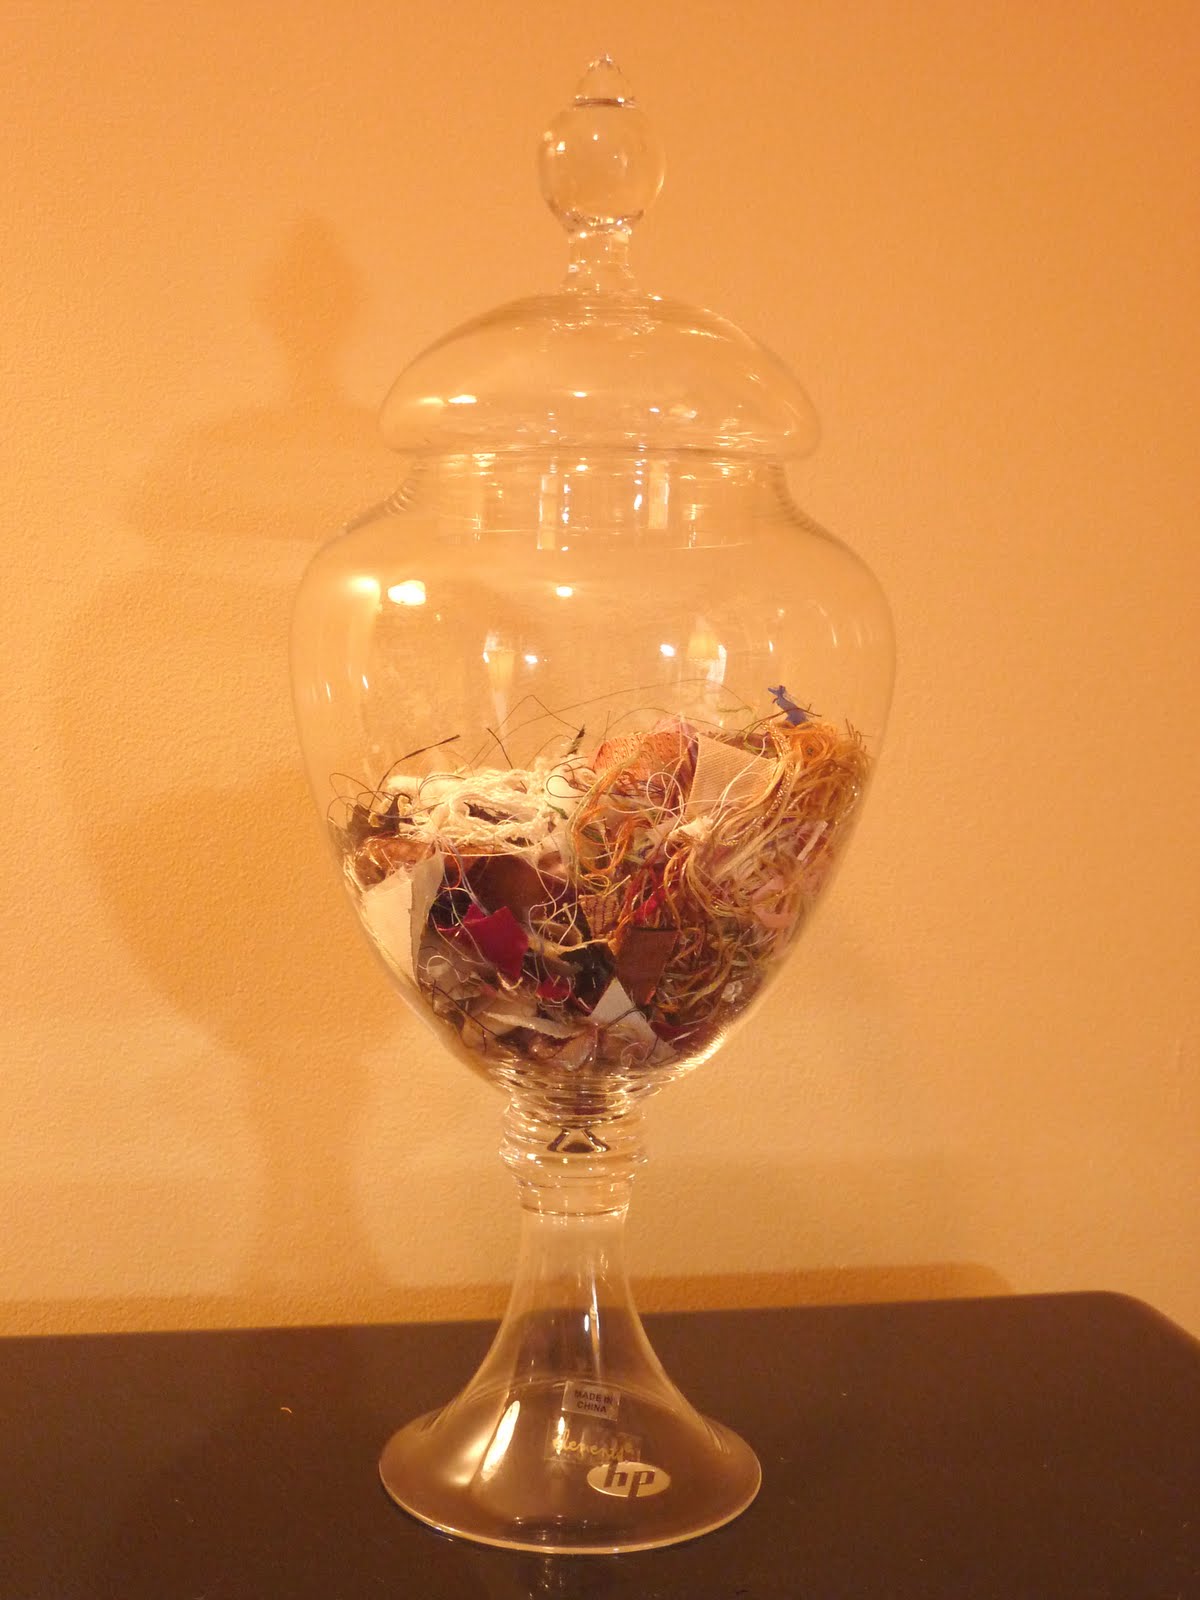
If I had seen this jar in someone else's sewing room I would have thought now there is someone like me that just hates to throw anything away but, unlike me, keeps her cast-aways in a pretty jar...until now. This is called an Orts Jar!


It is almost like a work of art isn't it. (kidding...a little). Well, below is what I had been keeping my scraps in. Yes, the old butter dish.


Pretty threads and scraps, but not such a pretty jar. It hadn't even dawned on me to make it pretty!


What I didn't know until I was HERE is that there is a name for this! ORTS! According to one of the comments ORT stands for Old Ragged Thread. I just love stitchin fingers! It is for stitchers of any kind and any level from beginner to professional and everyone in between. It is a great place to meet like minded souls, discuss issues and get help with a stitching problem or even just share your work and be inspired by eye candy posted by other stitchers. Sharon created this site and happens to be the one that shared her ORTS Jar. She is definitely in the professional league as her needlework is quite beautiful. Sharon is also the person that will be administrating the TAST challenge I mentioned on my previous post. Where does she find the energy?


Tuesday, March 22, 2011

Call for Glitter Storage Images

I just thought I would put the word out there that I am looking for images from fellow bloggers willing to share with other bloggers how they store/display their glitter. There will be a giveaway (yet to be determined) to go to the most popular/creative idea. For details, go to my other blog by clicking the Studio Solutions button on my side bar or following the link below:


http://ceostudiosolutions.blogspot.com/2011/03/challenge-no-1-glitter-storage.html


Spring seems to have finally arrived here and I'm beginning to see little touches of green. Yay! I hope you are all having a marvelous day and that spring is visiting you as well.

Take care,
Connie

Monday, September 6, 2010

Needing Help...

How do you (or do you?) keep records of your studio or shop inventory? I have avoided doing anything about this for years and now I'm thinking if I even want to consider starting to sell items I make, I probably need to have some sort of inventory. Also, it would probably be wise for insurance purposes.


I've started off recording the beads I have and if you look at my studio you will know that is a huge part of my studio. The majority I have no idea what I paid, when I bought them, or even the value of some. Some are old jewelry pieces that have been dismantled and separated.


After recording the first six small shelves, I am going back and numbering the jars and tubes with my sharpie to coincide with the list. I've also numbered my shelves and separated the list by shelves. Will this work as I move forward? Am I wasting my time?


Seriously, what do you all do? I know many of you do beading, scrapbooking and other things that have a million small pieces incorporated. I can't say I have seen much help on any of this tax/record keeping business end of things. Many of you have Etsy or other online shops, craft booths, and do craft shows. What is your system? How did you do it when you started out?


I would love to hear from anyone with ideas, suggestions or resources to share. I know there are some of you with great ideas and some wondering the same thing.

Friday, June 18, 2010

Sharing my Studio!

I just noticed that links for both of my blogs have been posted on the 'Show off Your Studio' party link at


My studio photos are actually published on my other blog and I would love for you to visit me there and leave me a comment! The link is

http://ceostudiosolutions.blogspot.com/2010/06/welcome-to-my-studio-makeover.html

Below is a photo showing the studio overall just to give you a sneak peak.


Be sure to go to Karen's blog, My Dessert Cottage (the first link above). She has put so much work into this and I think it is going to be a lot of fun to see all of the different studios artists work in! Check it out!

Saturday, May 8, 2010

Storing Art Supplies and Making it Look Pretty

A studio makeover is a continuous process. That is OK, because everything doesn't have to be done right away. It is best to work through things in sections so you aren't totally overwhelmed. My project this week was this counter. Below is a photo of the counter I bought at a discount store. This 'before' photo was taken as I was placing items in the room and everything hadn't quite found a home. The inside of the counter had dividers that work really well for my watercolor papers, pads, safety items and rolled up stained glass patterns while the bottom section holds some of my wire baskets of supplies. The top is a good solid work area and a good place for other supplies or work in progress.


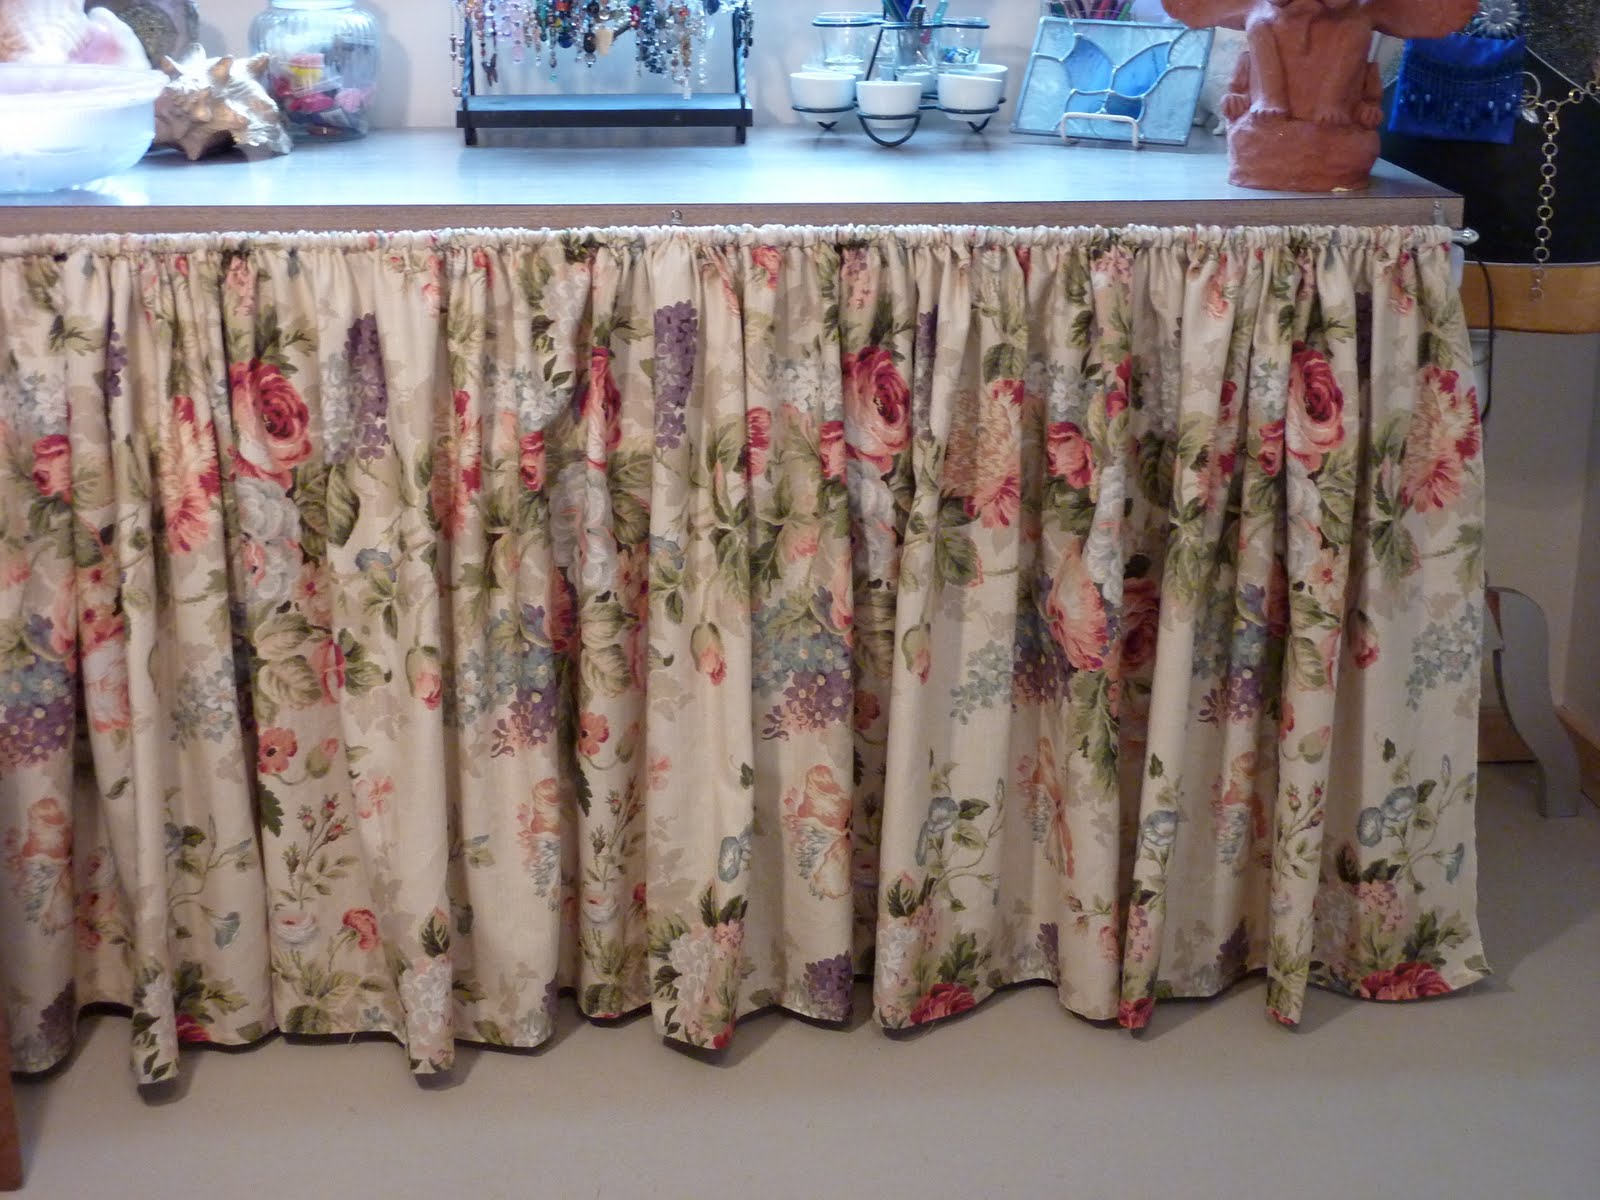
I decided I wanted to cover the front of the counter to hide the stored items. I had some fabric I'd purchased for cushions in our sun room. I obviously didn't finish that project, but bought ready made cushions on sale instead, but that is another story. The fabric seemed perfect for this project. I simply measured the width and height of my cabinet front, allowed about 6" in height for the hem and to make a pocket for the rod to fit through. The 'rod' is simply a curtain rod that snaps onto brackets which came with it. For the width of the fabric, I cut about 2 1/2 times the width to create the gathers. It wouldn't have to be that full, but I do like the look. Below are some 'after photos'.


I really like the finished look it gives this area. Although it is more practical I suppose to leave the shelves easily accessible, it just isn't as pleasing. I can still easily get to what I need. I relate it to leaving the doors off your kitchen cabinets or your closet--which by the way works great for some styles and tastes. Don't you agree this looks better than the before? Is this something you have done or could do in your studio?


This bottom photo is a metal shelf/towel bar that I set upside down on my counter (see above)and currently use it to hold some of the jewelry I designed. (Some of the jewelry is shown on my other blog: http://ceoriginals.blogspot.com/) Another repurposed item that could serve a multitude of functions other than the intended! Think 'outside the box' as they say.


Have a great weekend and Mother's Day!!!

Saturday, March 13, 2010

New Blog

Check out my new blog at http://ceostudiosolutions.blogspot.com/ Please keep in mind it is just the beginning and hopefully will become more compelling as it evolves.