Showing posts with label decor. Show all posts

Friday, December 26, 2014

Simple Shadowbox Tutorial

A few years ago I made this sort of shadowbox using two identical photo frames.  I thought I would share with you how I created it.  It was actually very easy to do and I know there are at least some of you who would enjoy it.  This would also make a economical display for a crazy quilt block or beadwork to keep it protected but not totally crush it.  It isn't real deep but does have a bit of wiggle room for some dimension.


As I stated, I began with two identical picture frames.  Remove the glass and backings and place flat backs together with outer edges lined up.


Most hobby stores carry the small latches and hinges as shown here.  I used the small nails included with each set to attach the hinges on one side and the latch on the opposite side.  You will want the latch to be somewhat tight so that it doesn't open too easily.  I didn't photograph it but did attach a saw tooth hanger to the back.  


The frames will now open like a book exposing the original backs of both frames.  From the inside insert the glass into what will be the cover, either tacking along the edges with framing tacks or glue/silicone in place.


For the other side I layered some batting and fabric of choice, tacking my items in place.  This was wrapped over card stock and either stitched or glued on the back side.  The back was then covered with the backing that came in the frame.  Set in place.  It should stay in place fine but can be tacked in place if desired.  You can see the layering in the following photograph.


I use mine to display my very first ribbon embroidery piece made from a kit many years ago.  The faux pearls were given to me by my great aunt when I was very young, probably 5 or 6.  I still remember her going to the back bedroom and coming out with it, laying it in my hands.  It is interesting, the things that we remember from so many years ago...special moments.


The silver button is so unique.  It is a raised 'Little Bo Peep' that sets above a convex disc.  It was in my grandma's treadle sewing machine drawer.  We found it after she had passed away.  Before giving it to me my aunt took it to a jeweler and had the shank cut off, adding a ring to hang it on a chain.  I think that probably ruined any money value it might have had, but to me it is special and I would never sell it for any amount.  I still have her treadle sewing machine too.


I hope you enjoy this tutorial and find it useful for displaying some of your treasures.

Wednesday, November 19, 2014

Peacock Ornament Exchange and Tutorial

When I was at the Crazy Quilt International Retreat in Kansas City we drew names to participate in an ornament exchange.  I don't know if this really qualifies as crazy quilting but it does sort of, kind of...  There weren't any hard and fast rules and hopefully the recipient will be pleased with this.


The name I drew was Tahlia.  I knew she liked peacocks so I started wondering how I could create a peacock ornament.  It turns out she also likes jellyfish, bunnies, hippos, sea turtles and Victorian items as well but by the time I learned that (within minutes) I already had ideas for a peacock rumbling through my mind.  I came home and went shopping.  I bought a deep bluegreen and a lighter, more aqua, coordinating fabric and then found a sheer netting type fabric with sparkles sitting next to the cutting table (and calling my name).  This post is photo heavy since most of us are very visual.  I thought this would be the easiest way to show you how I created the ornament.  I had the general idea in my head, bought supplies and then let my muse take over from there.


I drew a pattern on the computer and played with the design possibilities.  If you would like the actual pattern, send me your request and email address and I will send it to you.  You can adjust the size to fit your needs.

I traced the pattern onto my lining fabric (muslin) and then used this as a stitch guide (traced pattern on muslin facing out and basting to the back/wrong side of the fabric).  Note:  I placed the muslin over the pattern and traced it onto the muslin with a pencil.  Baste muslin lining to each of the five sections.


The next step was to embroider the center stem of each section.  I used a fly stitch.


I folded and pinned the pieces to see if I was going to be happy with the way it was coming together.


This is the broach (above photo) I had purchased online to use in the center of the ornament.  I later found the larger peacock pendant (shown below) at Hancock Fabrics.   As you can see I chose to use the larger peacock. 


Next I stitched each section/feather with a metallic green thread as shown using the stem stitch.  No two feathers are the same.  Just wing it (pun intended).  I know your eyes are probably now rolling ~ lol.


I then played with some sequins to get an idea of how or if they would work.


I decided to embroider (stem stitch) an oval on each according to the pattern to frame the sequins I had chosen.


I didn't want to stitch the sequins on until I was sure the decorative stitching was done to avoid the thread getting caught on the sequins.


I then attached a large copper sequin topped with a smaller faceted green sequin using a green seed bead.


The next step was to add muslin lining (with pattern outline as a guide) to the back side of each feather piece.


With right sides together I stitched together the front and back of each feather/section leaving about 1" open for turning.  Trim seams and turn right sides out.  Baste seam together.


Stitch the five sections together at the bottom.  I tacked the outer two feather sections together and the two aqua sections together at the base and then layered all five, tacking in place


Back shown above; front decorative side below.  Set this aside.


The sparkly netting was cut into a strip and gathered into a ring on one side as shown below.


Fan the netting out to cover the back.  Stitch the netting to the back of feather cluster.


I covered this with a fabric covered button to hide the stitching.


From the front I trimmed the netting a bit closer to the feather section with pinking sheers.  Since the netting is stiff and doesn't ravel, Tahlia can trim it closer if she wishes.


Here is the finished back view.


On the front I crunched up the part of the netting I trimmed off and stitched it down close to the center.


I then centered and stitched the peacock piece in place.


A narrow ribbon is stitched in place for hanging, hiding the stitching between the feather section and the netting.


Wouldn't a tree full of these in different 'peacock colors' be beautiful!  How about white or ivory?  This pattern would still be pretty using it to create fans with a variety of details.  It wouldn't need the peacock in the center.  You could use pretty rhinestone buttons.  Lots of possibilities!

Saturday, November 15, 2014

Completing Crazy Quilting Projects

Finally finished my combo CQJP 2013 with November Calendar Block.  I found some upholstery/drapery fabric that had the perfect burgundy and gold colors in a subtle pattern.  It coordinated nicely especially with the gold lace over burgundy fabric on the center block.  I may still add something more to the border later on but for now this project is crossed off my list and hanging for fall.


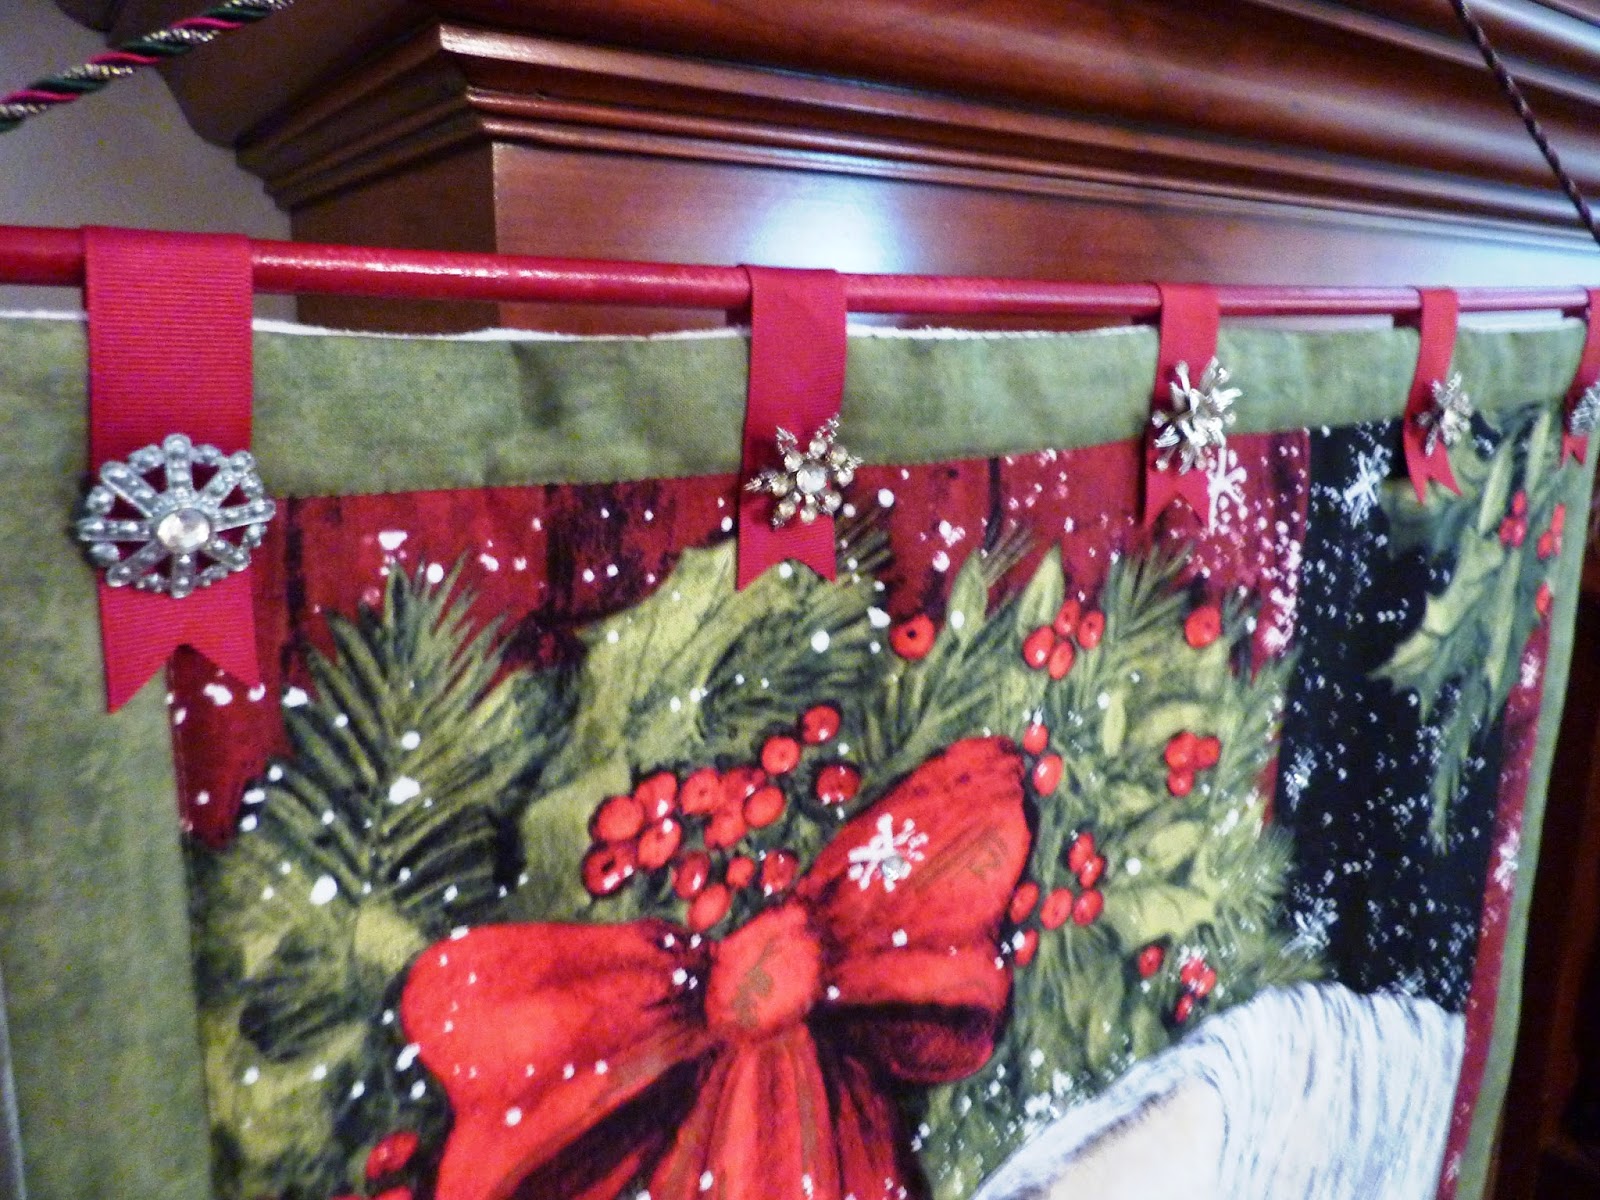
This isn't crazy quilting, but it is another project crossed off my list.  Mom saw this panel hanging at Hobby Lobby when we stopped by there recently.  She really liked it so I told her I would make it for her.  It is a beautiful panel.  We both loved horses as did my dad when he was alive.


I top stitched around the horse head, mane, eye and nostril as well as around some of the leaves.  I don't know if you can see in either of these photos but I added some adhesive rhinestones in the centers of the snowflakes and sporadically around the panel to give it a bit of sparkle like snow coming down.


I added ribbon loops and antique snowflake jewelry along the top, hanging it on a red dowel.


Her apartment doors opens to the hallway and there is a shelf just outside each door for decorating.  As you can see she likes to decorate.  It hangs just a bit low on her door, but a majority of those living in the senior apartments are short.  You have to be 70 or older to live there.


Yesterday I mailed off the blocks for my first round robin through Crazy Quilts International.  These blocks are going to be 2" x 3" when completed.  I am planning to make a mini fiber book with the completed blocks.  I have two covers (front and back) that I will be completing myself.


I am asking each person to choose a color from the palette below to complete their 'page'.  For instance one block/page will be stitched and embellished using one pastel color family (pink, blue, lavender, amber, green, or peach).


It feels so good to get some projects done and crossing them off my 'to do' list.  I am definitely a 'list' person.  Are you?

I mailed my ornament for a CQI ornament exchange yesterday also and should be receiving one in return next week.  Photos and a tutorial will be posted next week after I am sure the ornament has been delivered.  I hate spoiling anyone's surprise although I can tell you it is a peacock ornament since she is already aware of that.  I will also be receiving a mini cq set of blocks from one of the other rr participants for me to work on.  I am looking forward to both!

Sunday, October 19, 2014

Three Crazy Quilt Hearts

Finally completed the stitching on my three crazy quilt heart sachets.  Now to finish construction and get them listed.


This fall colored heart is actually done and I just listed it in my Etsy shop.  It ended up being 5" h x 5" across.


I finished the back with matching fabric.


I think this pink one ended up being a favorite.  I need to get these last two finished and listed.  All three are the same size.  I just used different techniques to embellish.


I let the rose on the fabric print be the focal point on this one.


I hate when I get my photos uploaded and then see loose threads on top of the designs.  Looking at this photo of the red heart I have an urge to do something with the left edge of the rose block.  Should I add something there or does it bother you too?

I really enjoy working on these things by I have other projects with higher priority that I need to get busy on.  Darn.  I love hearing receiving your comments!